Realistic driving
When you're new to the simulator, having as many indications and automated mechanisms as possible allows you to get to grips with its basic principle.
Ideally, however, you should be able to make lines with as few indications and automated mechanisms as possible. Here's how to understand signage "globally", so as to dispense with the need for interface information.
Note that if you're not using the Zuiki controller, I advise you to let the handle position visible.
Speed Limits
This section does not concern trains/sections using D-ATC/ATACS systems, as the limit is indicated directly on the dial.
For maximum speed on the track, please consult the line guide.
Track signals
 On the track, speed limits are represented by white signs with black writing. They are sometimes accompanied by a smaller number. Speed limits last for the duration of a curve or switch.
The first sign indicates the new limit, and the second (if present) indicates the distance subject to the limit (here, 75km/h limit on 150m). The limit is considered crossed once the entire train has passed (not just the front of the train).
There may be a second limit sign below the first. This is reserved for express trains with seating capacity.
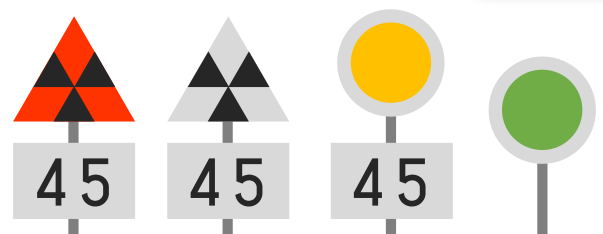
 There may also be a small orange (or yellow with red stripes) or green (🟧/🟩) square below the main panel. The orange square indicates that the limit can be increased by +5km/h in the case of "new high-performance trains" (i.e. all the trains proposed in the simulator). The green square also increases the limit by +5km/h, except in sections where the maximum speed is 120km/h or more. In this case, the limit is increased by +10km/h.
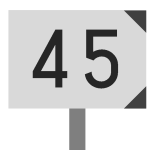 When you're on a switch, you'll see limit signs with black corners, so that it looks as if they're pointing to the right or left.
This means that if you need to take (or arrive at) a switch in the direction indicated, you must drive at the speed indicated.
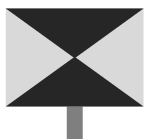 This sign signifies the end of the limit. Please note that the end is only effective once the train has completely passed the sign.
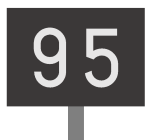 On the Oito line, there are also limits represented by black signs with white writing. These concern tilting trains (E353 series used as Limited Express trains on this line).
 These signs are used to indicate a temporary speed restriction (e.g. during railworks). The first/second sign warns of the speed limit (45km/h in this case) and is placed 500/600m before the third sign, which indicates the start of the limit.
The last sign indicates the end of the restriction, and is only effective once the train has completely passed the sign.
Light signals
Main signals
A track is divided into several sections called "blocks". There are several types of light signals:
- Starting signals, placed at the end of stations, often on single-track lines, and generally made up of 2 lights: red and green. They indicate whether the train is ready to move onto the track.
- Block signals are placed at the beginning of a block to indicate to the driver what to do inside the block.
- Home signals are placed before the train enters the station, to regulate entry.
Just before a switch, there may be several signals, in which case they are placed to match the profile of the switch, with one signal higher than the others. This represents the track that does not "use" the switch. For example, a red signal at the top left and a green signal lower down on the right means that the train will use the switch to go to the right (and slow down accordingly).
There are several signal formats, with more or fewer lights. Likewise, there are several indications. Here's a summary table.

-
Proceed (green): No worries on the lane, you can drive at the maximum authorized speed (except limitation)
-
Reduced speed (yellow/green): Displayed when the next signal is "caution" or "speed restriction". Speed is reduced to 75km/h or 65 km/h depending on the line.
-
Caution (yellow): Displayed when the next signal is "speed restriction" or "stop". Speed is reduced to 55km/h or 45 km/h depending on the line.
-
Speed restriction (yellow/yellow): Displayed when the next signal is a stop sign. Speed is reduced to 25 km/h.
-
Stop (red): The train must stop before entering the block.
When several speed limits are present (e.g. via a sign and via a light display), the speed to be applied is the lowest of the limits.
Repeat signal
There are also repeat signals. They are linked to the next block/home signal and repeat their signal. They are used when visibility makes it impossible to see the signal in advance. They display 3 lights in a row and have the following meaning:

- 3 vertical lights: the next signal is "proceed".
- 3 horizontal lights: the next signal is a "stop".
- 3 diagonal lights: other cases.
Distance signal
![]() A distance signal is linked to an home signal. They are used on lines that are not on an automatic lighted block system or where visibility is reduced, and are often used on single-track lines. They are rectangular in shape. The signal displayed lets you know what signal will be displayed on the home signal. Here's the correspondence:
A distance signal is linked to an home signal. They are used on lines that are not on an automatic lighted block system or where visibility is reduced, and are often used on single-track lines. They are rectangular in shape. The signal displayed lets you know what signal will be displayed on the home signal. Here's the correspondence:
| Distance signal |
Home signal |
| "Proceed" |
"Proceed" |
| "Reduced speed" |
"Caution / Speed restriction" |
| "Speed restriction" |
"Stop" |
Time and next station
To find out the current time, the easiest solution is... to look at the driver's pocket watch (except on the Oito line, where it's not visible in its entirety).
Otherwise, most trains are equipped with a screen displaying a variety of information. As this screen is often linked to the type of train used, details of this information are given on the associated line page. For the trains where station arrival time information is not available, the remaining time display (STA) is therefore recommended.
Finally, on lines where trains pass through stations without stopping (Rapid, Express, etc.), a "tsuka" sound is emitted before arriving at a station where you don't have to stop.
Terrain inclination
 The track inclination is indicated by signs of this type on the side of the rail. The black part indicates the inclination we're on, the white part indicates the new inclination.
The value of the inclination is written on the white part in ‰ (per mille), or L for flat ground. However, this may not be very visible in the simulator. So, if you're interested in the value, I'd advise you to leave the terrain indicator display active.
3 positions are possible:
/ : Rising terrain (as seen in hte example)
- : Flat terrain
\ : Downhill
Stop position in station

When the remaining distance and the stop guide are not visible, you need to use the signs indicating where to stop your train. These signs are square-shaped, turned 45°, with a colored outline (often red/orange) and often a number inside. If there's no number, it's a mandatory stop sign.
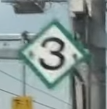
This number indicates the stop position for a train with as many cars (or fewer) than the number displayed. You therefore need to know the number of cars in your train (indicated on the simulation settings screen).

The aim is to stop with the front of the train at the sign. Note that the videos were taken with the camera at the front of the train. So, if you're playing with the cockpit view, it's worth bearing in mind that the perspective isn't quite right. You'll need to let the panel pass in relation to the front of the train.
Stopping position correction
When the correction is in manual mode, if you overshoot the stop position in a station, you'll have to manually reverse the train to position yourself correctly on the platform.
To move backwards, place yourself in neutral (N), then press [↓] twice to switch from forward (F) to reverse (R). Then move the handle to a power level (P1-P5) to reverse.
Once you're in the right position, don't forget to shift back into forward gear (neutral position, then press [↑] twice).
Making a good stop
hen you have to stop at a station, a good driver will apply a certain braking force initially, then, in a few steps (3 or 4), reduce the braking force until you come to a halt (for example: N > B7 > B6 > B4 > B2 > B1 or N > B7 > B5 > B3 > B1).
And, of course, a good driver won't apply a higher level while braking.
Dead man's switch
The dead man's switch function checks that the driver is still able to operate the train. The principle is simple: if, after one minute, no commands have been entered (buttons, handle changes), an alarm sounds.
The driver then has 5 seconds to press the dead man's switch to indicate that he is still able to operate the train. If he fails to do so, the train will automatically stop, activating the emergency brakes.
Dead section
On some lines (e.g. Jôban Line), certain sections are not supplied with power (e.g. following a change from DC <-> AC supply). In these areas, no power should be applied. They are represented by the following signs:

-
The first (2 black stripes on a yellow background): indicates the arrival of a dead section.
-
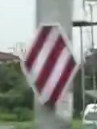
The second (3 red stripes on a white background): start of dead section (AC and/or DC)
-
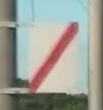
Third (1 red stripe on white background): start of dead section (AC)
-
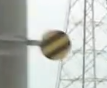
Fourth (white circle with black border): end of dead section
Note that the simulator does not take these dead sections into account, and that it is still possible to accelerate in them.
Air section

 On electrified lines, there are areas where more than one overhead line runs in parallel, mainly due to the fact that you're moving from one power substation to another. When a train passes through these areas, there's no problem. On the other hand, if a train has to stop at these points, it has to lower its pantographs to avoid creating huge short circuits or electric arcs.
So, when you're in an air section, avoid stopping. If you drive too slowly, an audible "Air section (エアセクション)" alarm will play and a symbol (A-S) will be displayed on the TIMS screen.
Using the horn
![]() This sign indicates that you must use the horn, with a long signal (4 to 6s), mainly because there is an unprotected level crossing.
This sign indicates that you must use the horn, with a long signal (4 to 6s), mainly because there is an unprotected level crossing.
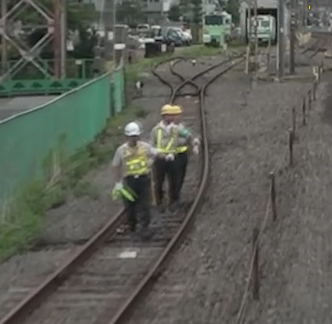 If you pass workers on the track, you should also use your horn, with a short signal (1s) to show that you've seen them. Usually, one of the workmen has a yellow flag, which he lowers when the horn is sounded.
Other cases where the horn is used include :
- Before entering a tunnel or crossing a bridge, with a medium signal, to warn any workers of your arrival.
- Passengers on the platform crossing the safety line (as on Densha de Go!)
- Children waving at you (as on Densha de Go!)
- When you arrive at a level crossing and pass another train arriving in the opposite direction (in the case of a double track). One train can hide another...
Other signals
![]() This sign indicates that a stop/halt is approaching (small station without signals, usually unstaffed or with very few staff, and with few or no facilities).
This sign indicates that a stop/halt is approaching (small station without signals, usually unstaffed or with very few staff, and with few or no facilities).
You can find more explanations of other panels in this Steam guide by suzu: https://steamcommunity.com/sharedfiles/filedetails/?id=3098325611