Commands
Here are the different controls available in the simulator.
Mouse
- Wheel click: Return to neutral position
- Wheel up: Reduce acceleration / Increase braking
- Wheel down: Increase acceleration / Decrease braking
Keyboard
Trains with a single handle (e.g. E233 series)
- [1] : Emergency braking
- [Q] : Reduce acceleration / Increase braking
- [S] : Return to neutral position
- [Z] : Increase acceleration / Reduce braking
Trains with two handles (e.g. 211 series)
- [/]: Emergency brakes
- [.] / [,]: Increase/Reduce braking
- [M]: Neutral brake position
- [Z] / [A]: Increase/Reduce acceleration
- [S]: Neutral acceleration position
KiHa 54 (Rumoi line)
- [M]: "Running"
- [,]: "Overlapped"
- [.]: "Service"
- [/]: Emergency brakes
- [F] / [R]: Change shifting handle
- [Z] / [A]: Increase/Reduce acceleration
- [S]: Neutral acceleration position
Other commands
- [C]: Hide the console
- [V]: Hide HUD
- [Esc]: Pause
- [↑]/[↓]: Shift into forward/reverse gear (handle in neutral position)
- [E]: Reset deadman switch
- [Enter]: Skip station waiting time (if set to "Manual" in the settings)
- [Enter]/[Reverse]: Level 1 horn
- [Reverse] Level 2 horn (on models with this feature)
- [Space]: ATS confirmation
- [X]: Alarm stop button
- [Y]: ATS reset (service)
- [U]: ATS reset (Emergency)
- [B] : Communication buzzer
(See the Realistic driving page for more information on these buttons)
- [I]: Slow advance / Inching
- [W]: Cruise control / Speed limiter
- [D]: Speed limit
- [K]: Hill start
- [T]: TASC deactivation
(See the Other features page for the operation of these 5 buttons)
Xbox 360/PS/Switch controller
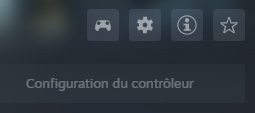
The simulator is Steam Input compatible. This means that controller commands can be configured via Steam. To do this, once the controller is connected, simply click on "Controller configuration" to display the configuration screen.
Once on the configuration screen, simply select one of the 3 action groups, then click on View/Modify Layout.
Zuiki "Densha de Go" controller
The simulator supports this controller natively. However, you may need to configure it in Steam when you first connect it.

Once the controller is connected, go to “Steam -> Settings -> Controller”. Depending on the model, the name will be “ZUIKI Mascon” or “One Handle Mascon”. Then click on “Begin Setup” and press the keys in this order, not too fast:
A, B, X, Y, Left, Right, Up, Down, A, A, Push on EB and go back to N, Pull on P5 and go back to N, A, A, A, A, A, A, L, ZL, R, ZR, -, +, Home, Capture
Once done, you can close the configuration window and the settings window.
If you need to restart the configuration (due to an error), click on “Start test” in the parameters, then on “Configure controller inputs”.
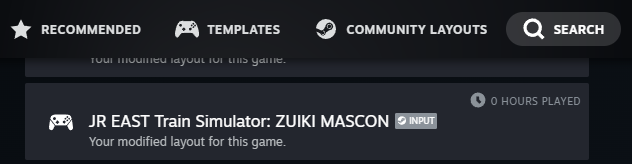
Next, open the controller settings for JRETS (via the joystick button on the game screen in the library). Click on the current layout (“Official layout: DirectInput Default”).

Then go to “Search” and select the “ZUIKI MASCON” layout and click “Apply layout”.
You can now close the configuration window. The controller is now ready for use.