Joban Line
Introducing
The Joban Line runs from Ueno Station in Taito-ku, Tokyo, to Sendai Station in Sendai City, Miyagi Prefecture, via Chiba, Ibaraki, and Fukushima prefectures, and is the longest line among JR lines not named "Main Line. Until now, the Joban Line has operated to and from Ueno Station, but on March 14, 2015, the Ueno Tokyo Line began service, with some trains now running between Shinagawa and Ueno.
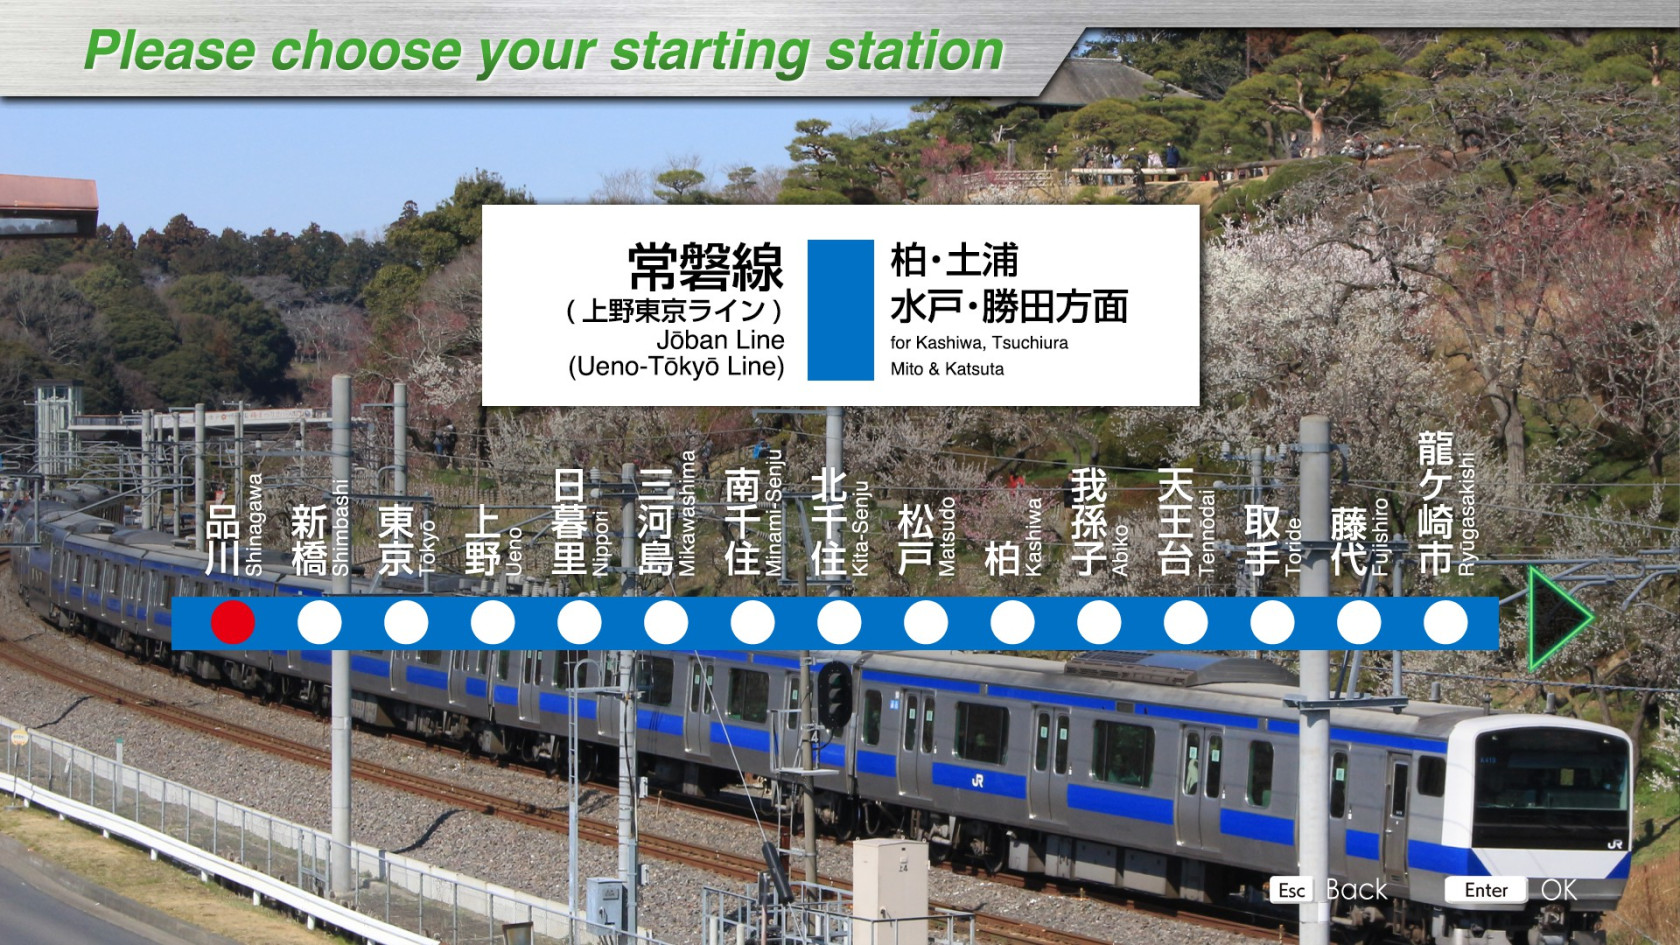
This DLC includes the Ueno Tokyo Line between Shinagawa Station and Ueno Station and the Joban Line between Ueno Station and Katsuta Station.
The line is characterized by the change of electrification system along the way, and there is a DC/AC switchover (dead section) between Toride and Fujishiro stations. (Shinagawa Station to Toride Station: 1500V DC, Fujishiro Station to Sendai Station: 20,000V AC)
Another major feature of this line is that it can operate at 130 km/h, the highest speed on a conventional JR line.
The first half of the line shows a significant change in scenery along the line from an office area in central Tokyo to a bed town. The second half of the line features the peaceful green landscape of Ibaraki Prefecture.
The long-distance route, which takes about two hours, allows passengers to enjoy driving while viewing the changing scenery along the route.
Key data
- Line Length: 133.7 km
- Number of stations: 29
- Safety system: ATS-P
- Train model: E531-0 series
- Max speed:
- Shinagawa ~ Nippori : 110 km/h
Nippori ~ Katsuta : 130 km/h (limite avec 🟩 : +10 km/h).
- Shinagawa ~ Nippori : 110 km/h
- Routes:
- Shinagawa ~ Katsuta (1177M) : "Local" - 10 cars - 29 stations - 133.7 km
- Shinagawa ~ Tsuchiura (1157M) : "Local" - 10 cars - 18 stations - 63.8 km
This line contains 6 dead sections, the first of which, between Toride and Fujishiro, involves a change of current (DC -> AC). Note that a voice warning is issued, as well as a flashing indicator at the top right of the right-hand screen, depending on the type of zone:
- DC -> AC changeover zone: "Mamonaku kōchoku section / 間もなく交直セクション" alert and "交直切換" indicator.
- Single neutral zone: "Mamonaku komogomo section / 間もなく交交セクション" alert and "交交" indicator.
Console detail
Apart from the pocket watch and the door-closing indicator in the center of the console, there are 2 displays. In addition, on the left, above the console, is the dial for the ATS-Ps, which will not be used.
Main screen

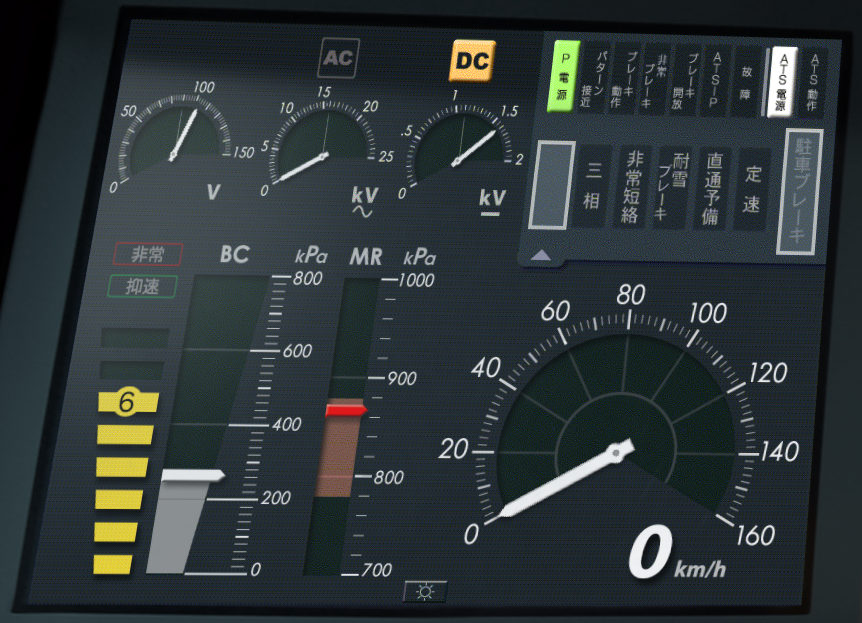
The first screen (train technical info) displays electrical voltages (including DC/AC indicator) and various indicators at the top.
The bottom area contains:
- Brake level and indicators for emergency brake in red (非常) and speed limit in green (抑速)
- Brake cylinder pressure (BC)
- Main air reservoir pressure (MR). Note that if this falls below the red zone (780kPa), the compressor starts up.
- Speed dial.
Here are the translations of the indicators:
|
|
TIMS screen
The screen on the right shows various information about the line.

At the top is the current time, current speed and distance between the train and :
- Tokyo, if the train is between Shinagawa and Mikawashima
- Nippori, if the train is after Mikawashima
Next you'll find information about the train, the current station and the next 2 stations: station name, arrival time (except departure station) and departure time. Between each line is the journey time between stations. IF the station is a transit station, the departure time is replaced by a downward-pointing arrow.
Next, in yellow, is the name of the next station where the train will stop, and the arrival time (useful when the next 2 stations are through stations).
Finally, at the bottom of the screen are the different carriages. The indicator above each car shows whether the doors are open (in red) or not. Cars can take on 2 colors: blue (engines in use) or yellow (brakes in use).
Personal opinion
This long line requires a certain amount of stamina if you want to do it all in one go. It also has a fair number of speed limits, not to mention 6 dead sections.
The main advantages of this line are that you gradually move from Tokyo's ultra-urban landscape to the rural plain, and that you can drive at up to 130 km/h.
Useful links
Wikipedia : https://en.wikipedia.org/wiki/J%C5%8Dban_Line
Driver's guide: https://docs.google.com/spreadsheets/d/1bmmf3sH66l5TGKOQmtigAochaUtXWKdScnRs0oIa6y8/edit#gid=422915208
Movie of the line: https://www.youtube.com/watch?v=nck7udsO4Ts
Timetables (in japanese):
- Shinagawa ~ Katsuta (1177M) : https://docs.google.com/spreadsheets/d/1bmmf3sH66l5TGKOQmtigAochaUtXWKdScnRs0oIa6y8/edit#gid=63629833
- Shinagawa ~ Tsuchiura (1157M) : https://docs.google.com/spreadsheets/d/1bmmf3sH66l5TGKOQmtigAochaUtXWKdScnRs0oIa6y8/edit#gid=281150

