Simulator's Interface
How to navigate the simulator's screens.
Main Menu
The uncluttered main menu provides access to the essentials.

It provides access to the following items:
- Settings : Accesses the simulator settings screen.
- Drive: Accesses driving simulation
- Shut Down: Exit the simulator
- E/J: Press to open the simulator manual (in English or Japanese)
Settings
The settings screen lets you modify several elements of the simulator, to increase realism or make it more accessible. It is divided into 4 tabs.
Press "D" to restore default values. And by pressing "M", you can replay the introductory video.
System
This screen allows you to set certain parameters relating to the overall operation of the simulator.
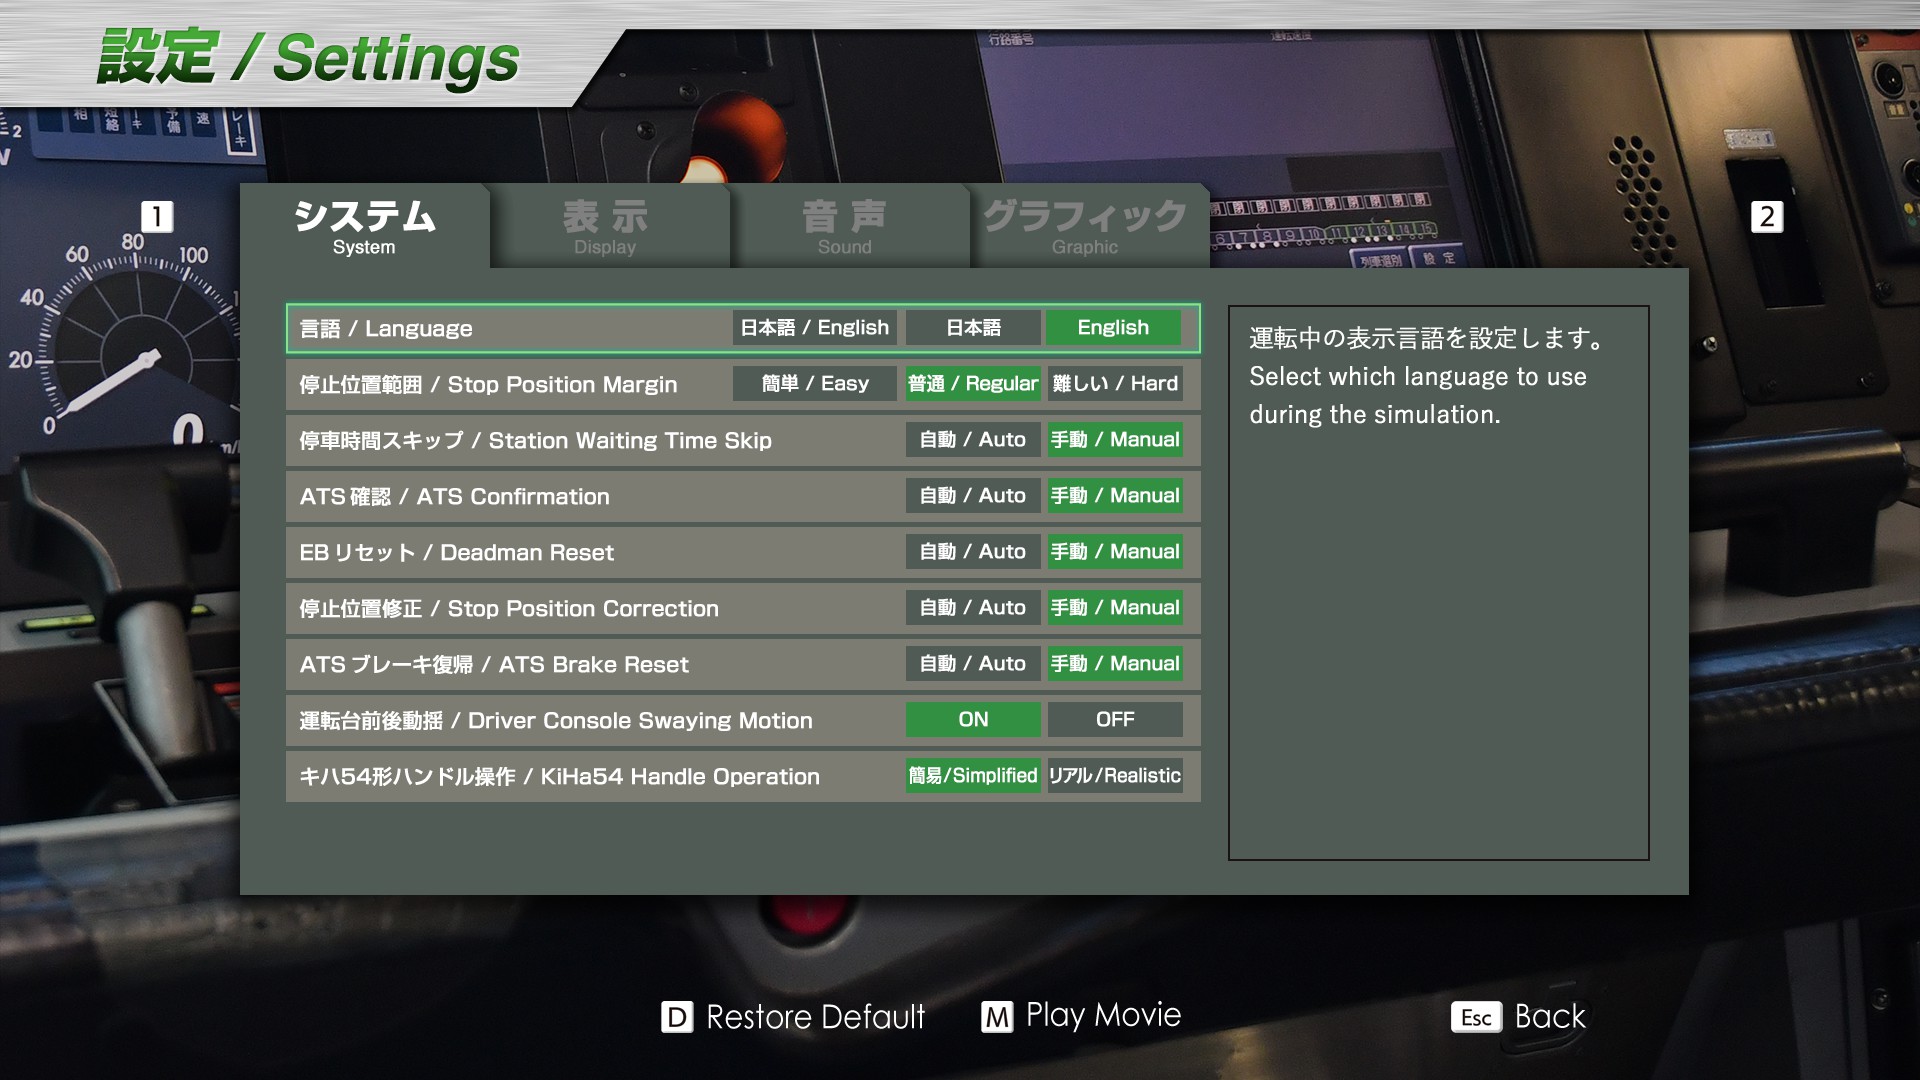
- Language: Sets the simulator interface to English and Japanese (alternately), Japanese or English.
- Stop Position Margin: Allows you to set the margin of error when the train stops in the station, in relation to the stop position. Easy: +/- 5m, Regular: +/- 3m, Hard: +/- 1m (don't affect Yamanote line)
- Station Waiting Time Skip: Reduces the waiting time between arrival and departure during long station stops. If set to "Manual", press [Enter] to skip this waiting time.
- ATS Confirmation: Set ATS confirmation to automatic or manual.
- Deadman Reset: Enables automatic or manual validation of Deadman reset. (see Realistic driving page)
- Stop Position Correction: Sets stop position correction to automatic or manual. When activated, if you overrun the stop position in the station, the simulator will automatically reposition you to the correct position.
- ATS Brake Reset: Sets the ATS brake reset to automatic or manual. (see Safety systems page)
- Driver Console Swaying Motion: Activate or deactivate the acceleration/deceleration animation in the cab.
- KiHa54 Handle Operation : Set the control of the KiHa54 train to "Simplified" or "Realistic" (see Rumoi Line)
Display
This screen lets you set which elements will be visible on the simulator screen.

- STA: Displays the time and time remaining to reach the next stop.
- Next Station: Displays next station name and status:
- Stopping at (green sign)
- Next (green sign) : Next station with stop
- Pass (blue sign): Next station without stop
- Speed: Displays current speed
- Maximum Speed : Displays current speed limit and next limit
- Distance: Distance to next station
- Incline: Incline of terrain (in per mille)
- Handle Position: Power/brake handle position
- Stop Mark: Station stop indicator
- Guidance Pop-up: Driver assistance messages
Sound
This screen lets you set the sound level of the various simulator elements.

- BGM Volume : Sets the volume of background music in menus.
- SE Volume: Adjusts the volume of sound effects in menus.
- Motor - Engine Volume : Adjusts engine volume
- Motor - Engine Sound Setting: Engine sound is either Always On or only if the engine is in the same car as the driver (Realistic).
- Running Sound Volume: Sets the volume of the sound of the train in motion (rails, switches, other trains, etc.).
- Cockpit Sound Volume: Adjusts the volume of various cockpit elements (buttons, alerts, brakes, etc.).
- Handle Sound Volume: Adjusts the volume of the gearshift
- Station Ambient Sound Volume: Adjusts the volume of the ambient sound during station stops.
- In-Car Announcement Sound Volume: Adjusts the volume of in-train announcements made by the controller.
- Driver volume: Adjusts the volume of "pointing-and-calling" announcements made by the driver.
Graphic
This screen allows you to set some of the parameters used to playback the videos used by the simulator.

- Video Cache: Amount of video memory (VRAM) used to cache video. The higher the cache, the smoother the video. If your video card has more than 2GB of RAM, we recommend setting it to "High".
- Driver Console Display Format: Show the driver console on the same screen or on a secondary screen.
- Video Threshold: Number of segments per frame processed by the GPU. We recommend that you leave this setting unchanged.
Line selection and setup
Line selection
After selecting "Drive" on the main screen, the line selection screen appears.

This screen lists the lines that can be played and those available for purchase (grayed out). The basic set contains these 4 lines:
- Kehin-Tohoku / Negishi line (complete - 46 stations)
- Tokaido line (demo - 3 stations)
- Chuo line (demo - 3 stations)
- Oito line (demo - 5 stations)
If the line has a microphone icon, it also contains controller announcements.
The "Line data" section contains some information about the highlighted line:
- Length: The length of the line
- Sta.no.: Number of stations
- Safety system: The safety system used on the line
The train model used on the line is also displayed, as is the line map.
Simulation setup
Once the line has been selected, the simulation configuration screen appears.

The "Line" field indicates the line to be used. Click on it to return to the line selection screen.
The "Schedule" field shows the information for the simulated route:
- Type: Type of train used (Local, Rapid, etc...)
- Destination: Arrival station
- No. of cars: The number of cars making up the train
- Train reporting no.: Train identification number
Click on "Schedule" to open the route selection screen.

The "Departure station" field indicates the departure station. Clicking on it opens the departure station selection screen.
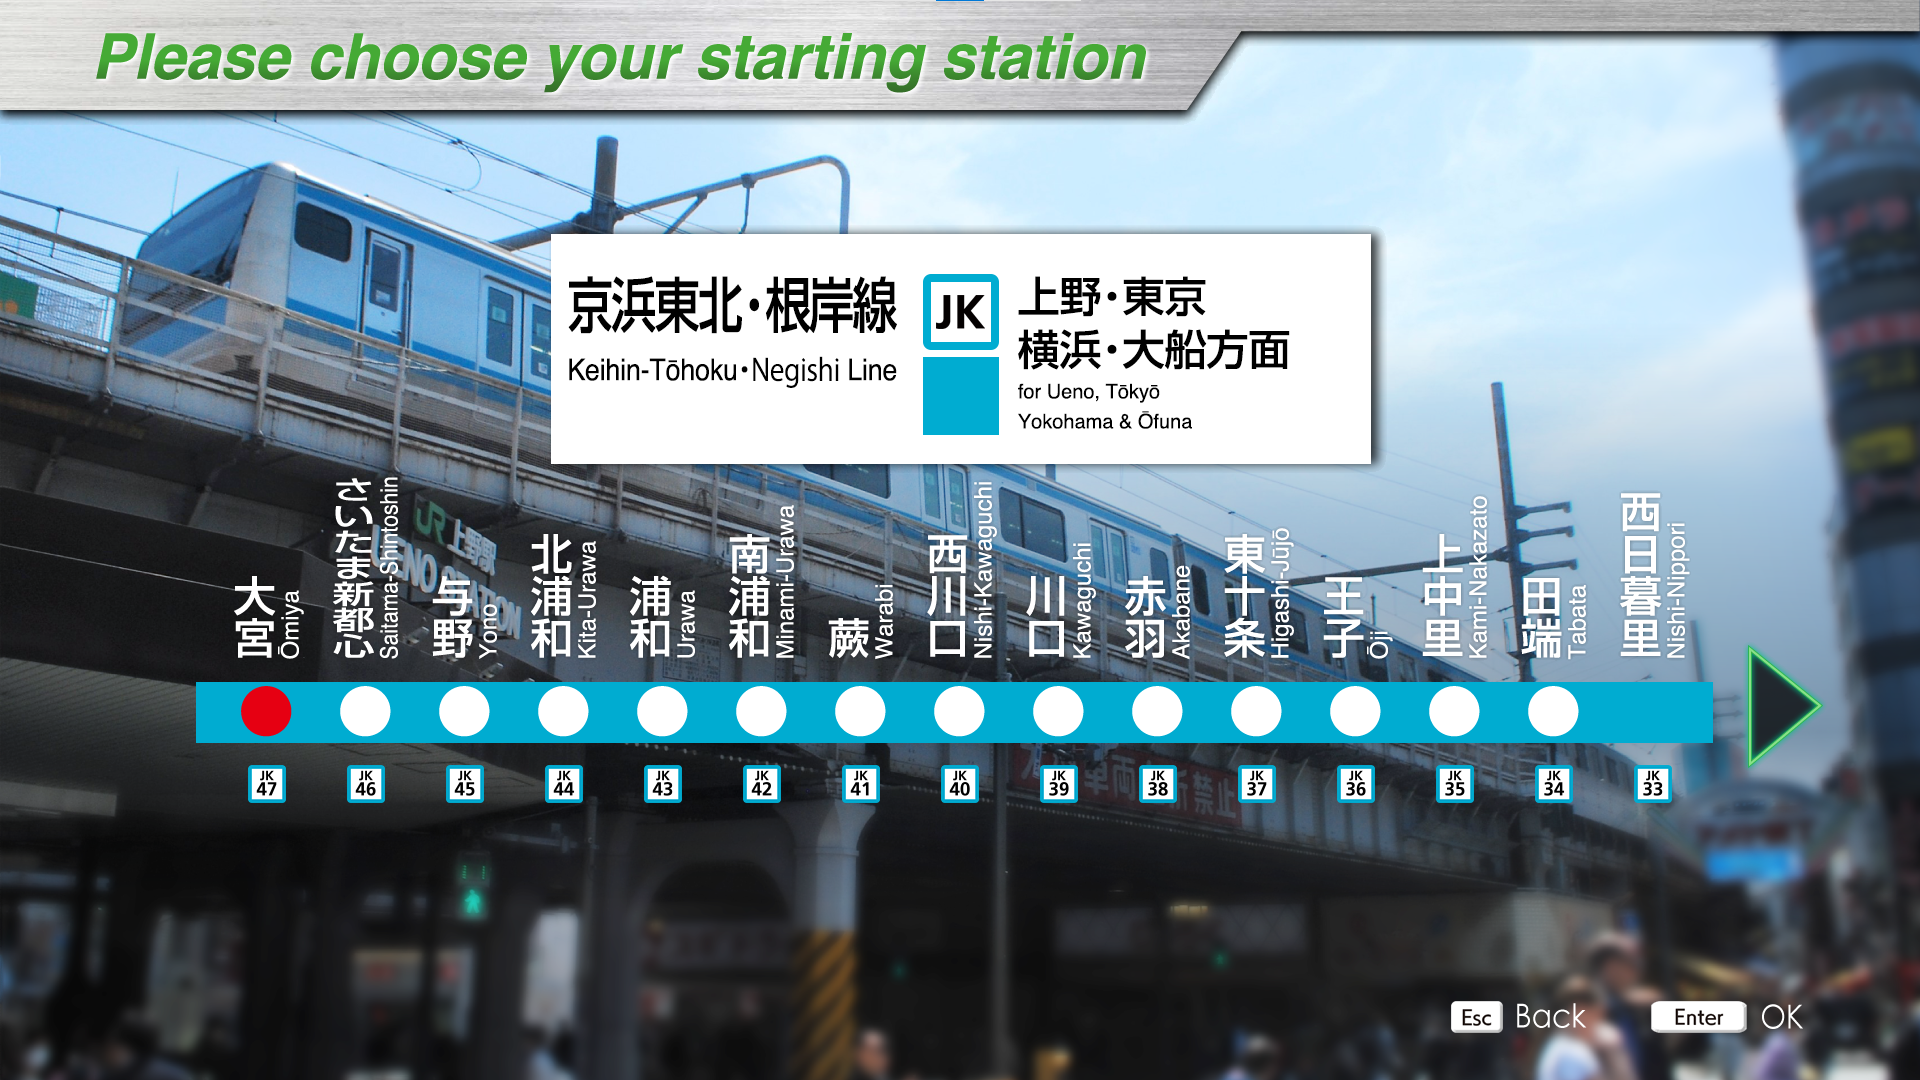
Finally, the "Start" button starts the simulation.
Simulator screen
Interface elements
The simulator screen contains multiples information.

The area at top right contains various information that can be hidden in the settings.
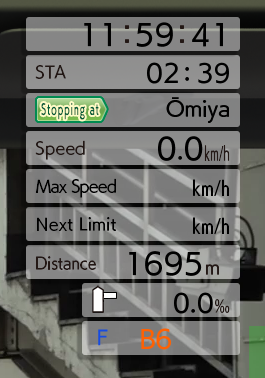 From top to bottom:
- Current time
- Time remaining to next stop. (STA)
- Next station name and status:
- Stopping at (green sign)
- Next (green sign): Next station with stop
- Pass (blue sign): Next station without stop
- Current speed (Speed)
- Current speed limit (Max speed)
- Next speed limit
- Distance to next station (Distance)
- Terrain inclination (in ‰ - per mille)
- Running mode (Forward/Neutral/Reverse) and power/brake handle position
Driver assistance messages are displayed in the top left corner of the screen.
The bar on the right-hand side appears when the train arrives at a station. It helps you stop the train at the right place (see Train Driving Basics page).
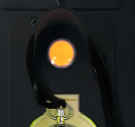 When the console is displayed (via the C button), different elements are shown, depending on the type of train. A common feature is the door closure indicator.
When this is off, the doors are open. When departing, you must wait for this light to come on before moving on.
The screens for the various trains are described in detail in the sections on each line.
Interface location
You can show/hide the control console by pressing the "C" key.
When displayed, the console can be zoomed and moved using the following commands:
- Zoom the console: Use your mouse wheel while holding down the "Shift" key.
- Move the console (if enlarged): Move your mouse while holding down the "Shift" key and the left mouse button.
- Return to default size: Press "C" while holding down the "Shift" key
Pause
Press [Esc] in order to pause the simulator. Press again to unpause it.

- Change station : restart the simulation at the selected station.
- End play : Stop the simulation.
- Settings : Allows you to change display/sound settings without stopping the simulation.
Commands
Here are the different controls available in the simulator.
Mouse
- Wheel click: Return to neutral position
- Wheel up: Reduce acceleration / Increase braking
- Wheel down: Increase acceleration / Decrease braking
Keyboard
Trains with a single handle (e.g. E233 series)
- [1] : Emergency braking
- [Q] : Reduce acceleration / Increase braking
- [S] : Return to neutral position
- [Z] : Increase acceleration / Reduce braking
Trains with two handles (e.g. 211 series)
- [/]: Emergency brakes
- [.] / [,]: Increase/Reduce braking
- [M]: Neutral brake position
- [Z] / [A]: Increase/Reduce acceleration
- [S]: Neutral acceleration position
KiHa 54 (Rumoi line)
- [M]: "Running"
- [,]: "Overlapped"
- [.]: "Service"
- [/]: Emergency brakes
- [F] / [R]: Change shifting handle
- [Z] / [A]: Increase/Reduce acceleration
- [S]: Neutral acceleration position
Other commands
- [C]: Hide the console
- [V]: Hide HUD
- [Esc]: Pause
- [↑]/[↓]: Shift into forward/reverse gear (handle in neutral position)
- [E]: Reset deadman switch
- [Enter]: Skip station waiting time (if set to "Manual" in the settings)
- [Enter]/[Reverse]: Level 1 horn
- [Reverse] Level 2 horn (on models with this feature)
- [Space]: ATS confirmation
- [X]: Alarm stop button
- [Y]: ATS reset (service)
- [U]: ATS reset (Emergency)
- [B] : Communication buzzer
(See the Realistic driving page for more information on these buttons)
- [I]: Slow advance / Inching
- [W]: Cruise control / Speed limiter
- [D]: Speed limit
- [K]: Hill start
- [T]: TASC deactivation
(See the Other features page for the operation of these 5 buttons)
Xbox 360/PS/Switch controller

The simulator is Steam Input compatible. This means that controller commands can be configured via Steam. To do this, once the controller is connected, simply click on "Controller configuration" to display the configuration screen.
Once on the configuration screen, simply select one of the 3 action groups, then click on View/Modify Layout.
Zuiki "Densha de Go" controller
The simulator supports this controller natively. However, you may need to configure it in Steam when you first connect it.

Once the controller is connected, go to “Steam -> Settings -> Controller”. Depending on the model, the name will be “ZUIKI Mascon” or “One Handle Mascon”. Then click on “Begin Setup” and press the keys in this order, not too fast:
A, B, X, Y, Left, Right, Up, Down, A, A, Push on EB and go back to N, Pull on P5 and go back to N, A, A, A, A, A, A, L, ZL, R, ZR, -, +, Home, Capture
Once done, you can close the configuration window and the settings window.
If you need to restart the configuration (due to an error), click on “Start test” in the parameters, then on “Configure controller inputs”.
Next, open the controller settings for JRETS (via the joystick button on the game screen in the library). Click on the current layout (“Official layout: DirectInput Default”).

Then go to “Search” and select the “ZUIKI MASCON” layout and click “Apply layout”.
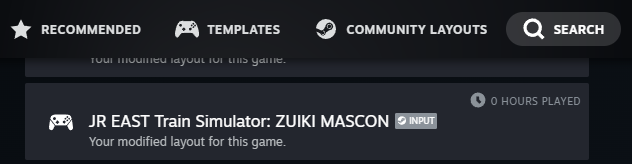
You can now close the configuration window. The controller is now ready for use.